AWS Account Configuration
Creating, and configuring an AWS account for getting data from Pennsieve Discover
Overview
Pennsieve Discover allows users to get direct access to published data using their own Amazon Web Services (AWS) account. Amazon is one of the worlds largest cloud providers in the world. With an AWS account, you can get access to cloud-storage, compute, and many other cloud-based services. Having an AWS account is required in order to get access to data over 5GB from Pennsieve Discover.
A walkthrough of all steps, from setting up the AWS account to downloading a dataset from Pennsieve Discover can be found in the following YouTube video. The rest of this page details each of the steps described in the video.
Note
The video is slightly outdated and references the Blackfynn Discover platform but the workflow is the same for the Pennsieve platform.
Step by step instructions
Creating an AWS account
First, click on the button below to open a webpage that guides you through the process of setting up an AWS account. This account is completely independent from Pennsieve and Pennsieve has no access to any of the information you will be entering when setting up your AWS account.
After clicking on the Create a Free Account button, AWS will guide you through the requirements to setup an account. During this process, you'll be asked to:
- Choose either a company or personal account
- Add payment information
- Verify your identity
- Select a support plan
Once you've completed the setup steps you'll receive an email to confirm your email and ensure your account is setup correctly. Once you receive your email, you can sign in to the AWS Console using your root user account.
Important
Your AWS root user (which you just created) provides full access to all of your AWS services and should never be shared.
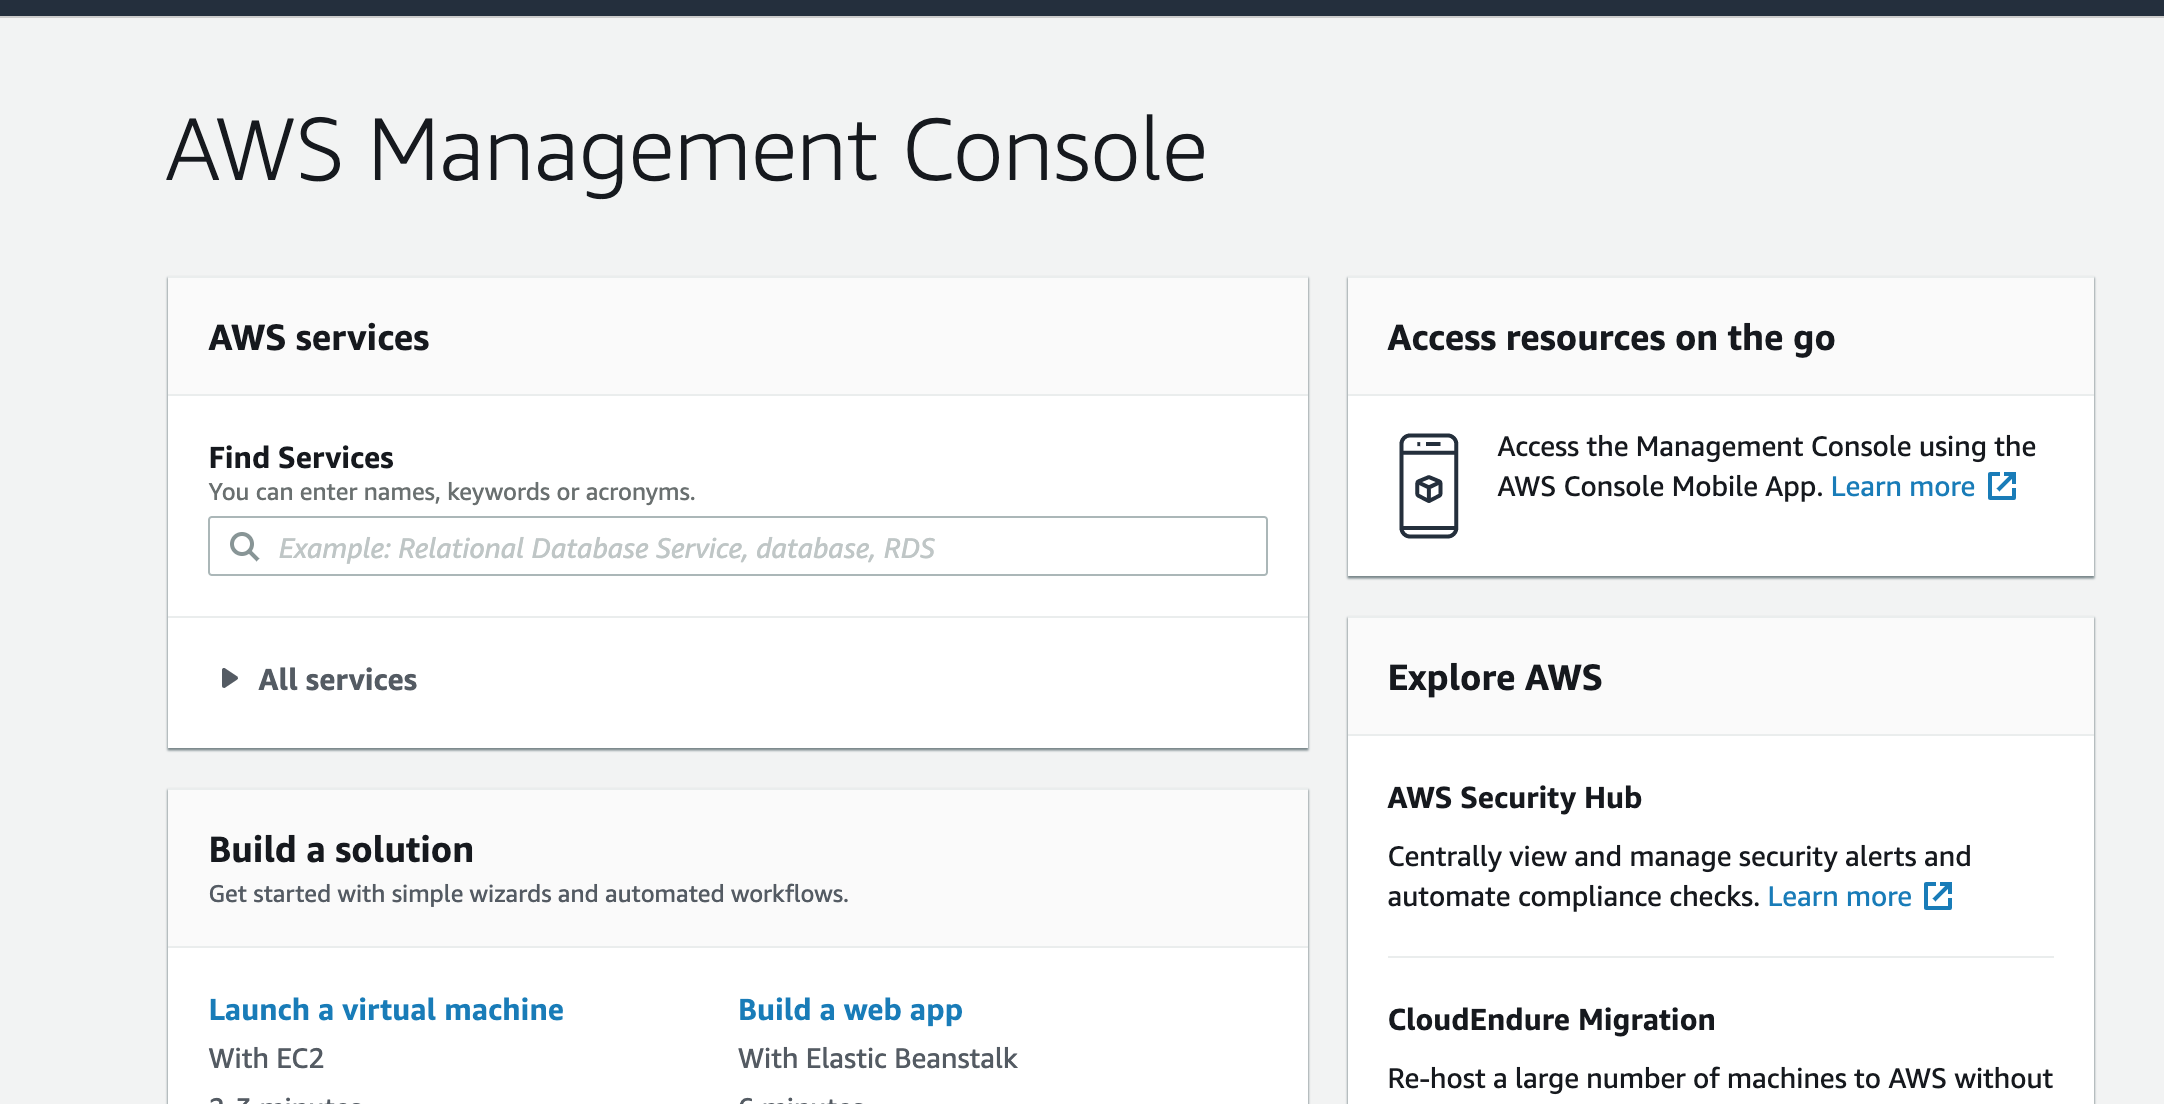
AWS Management Console
Creating an IAM User Role for Managing AWS Permissions
Using your root account, we will now create an IAM user inside your AWS account. Each AWS account can have many IAM users which are managed through the AWS Identity and Access Management (IAM) service. Going forward, you will use credentials associated with this IAM user to access AWS in a secure way.
AWS recommends to not use the root user for everyday tasks (from the AWS docs)
"We strongly recommend that you do not use the root user for your everyday tasks, even the administrative ones. Instead, adhere to the best practice of using the root user only to create your first IAM user. Then securely lock away the root user credentials and use them to perform only a few account and service management tasks. To view the tasks that require you to sign in as the root user, see AWS Tasks That Require Root User."
You can access the IAM dashboard by typing "IAM" in the Find Services search box.
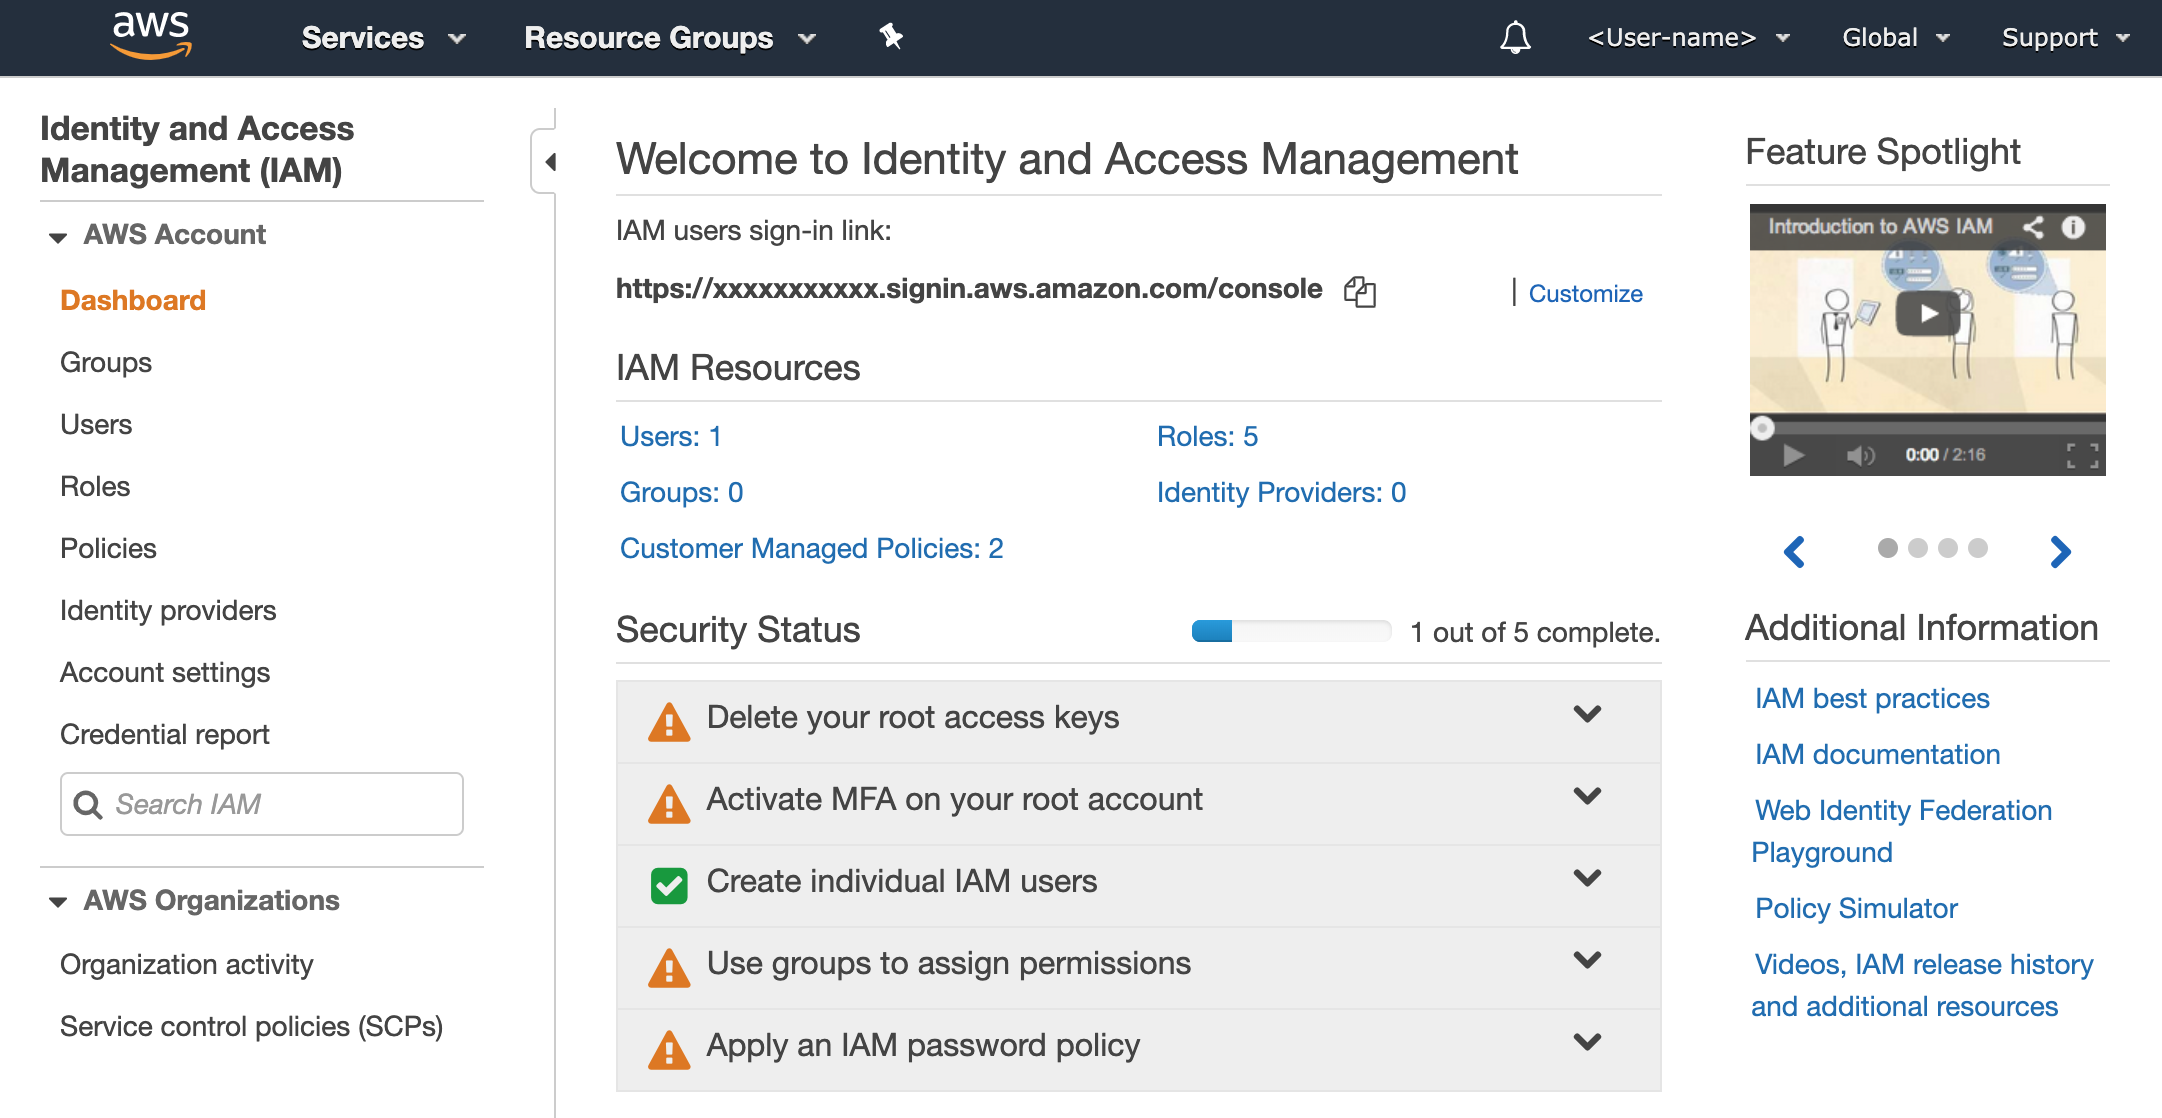
Create a new IAM user by selecting Users in the left side-panel, and then clicking on Add User . You will be guided through a number of screens to setup the IAM user.
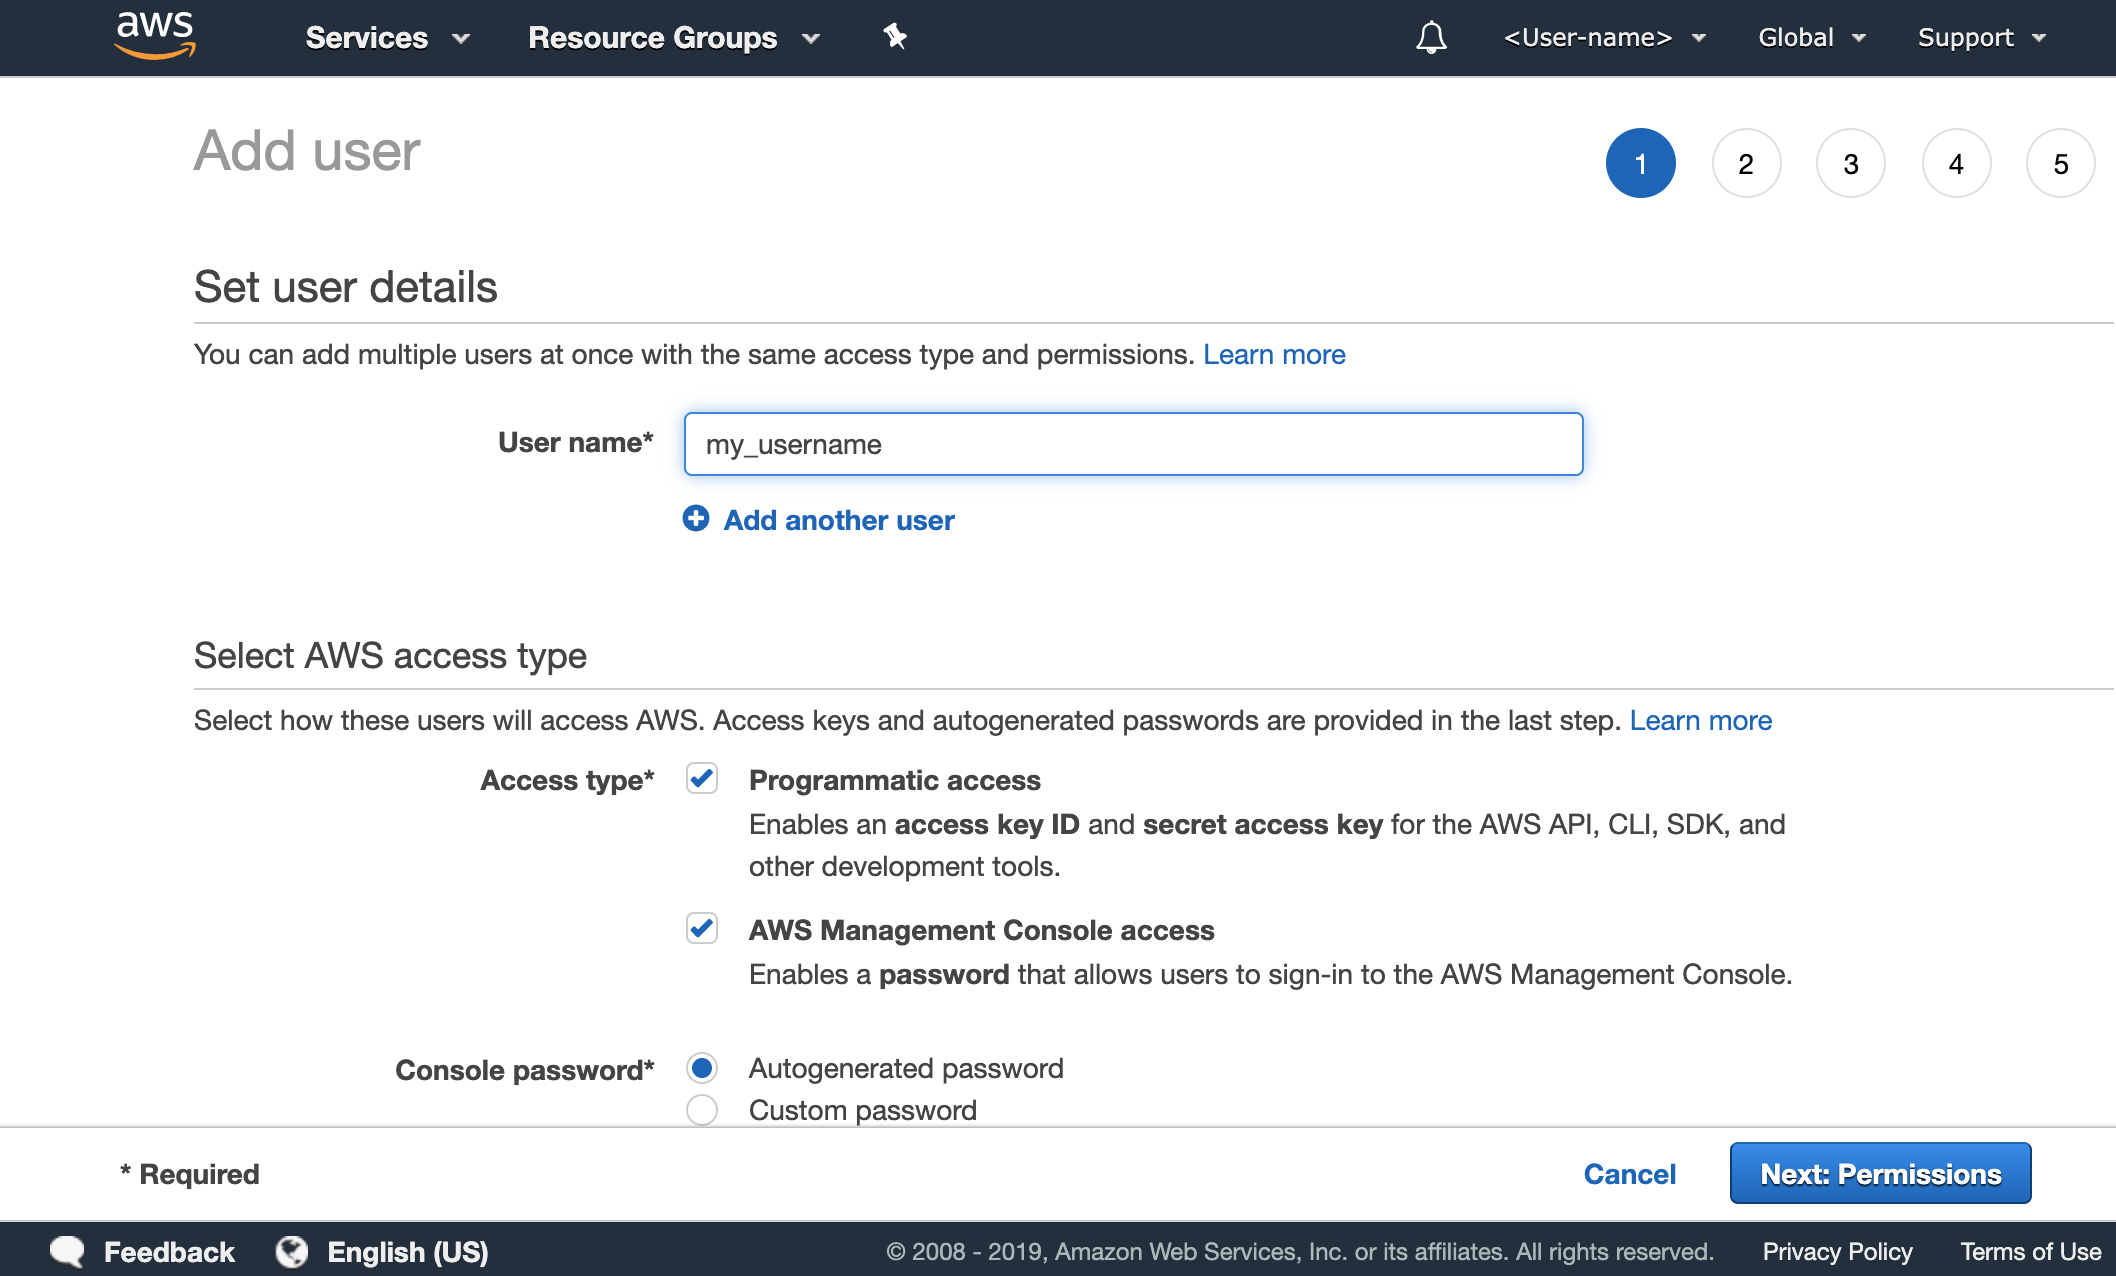
Step 1
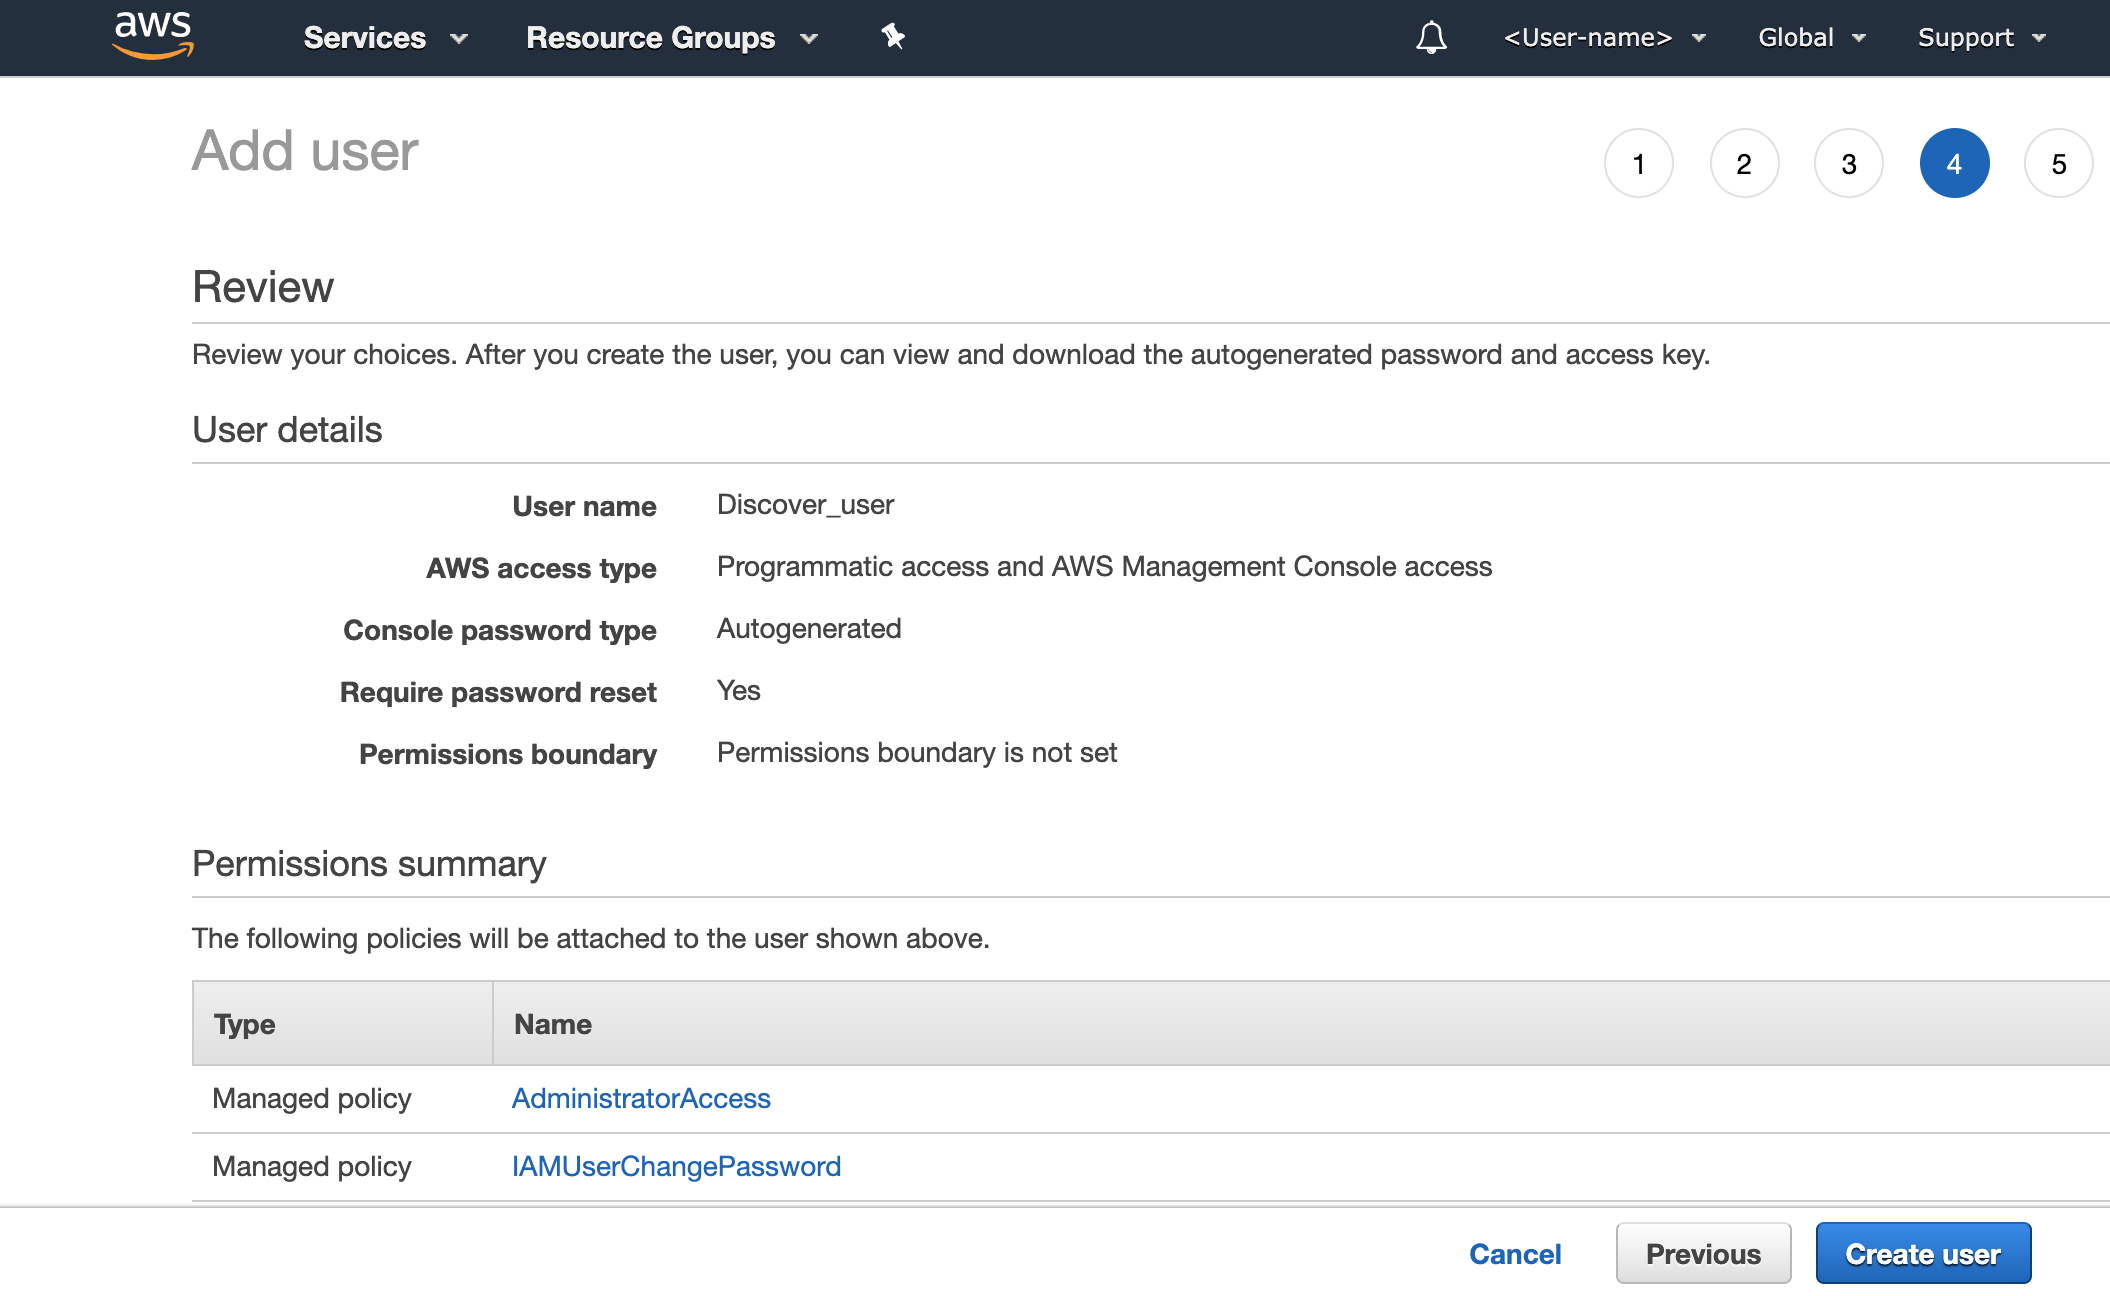
Select a username and grant this user both Programmatic, and AWS Console access.
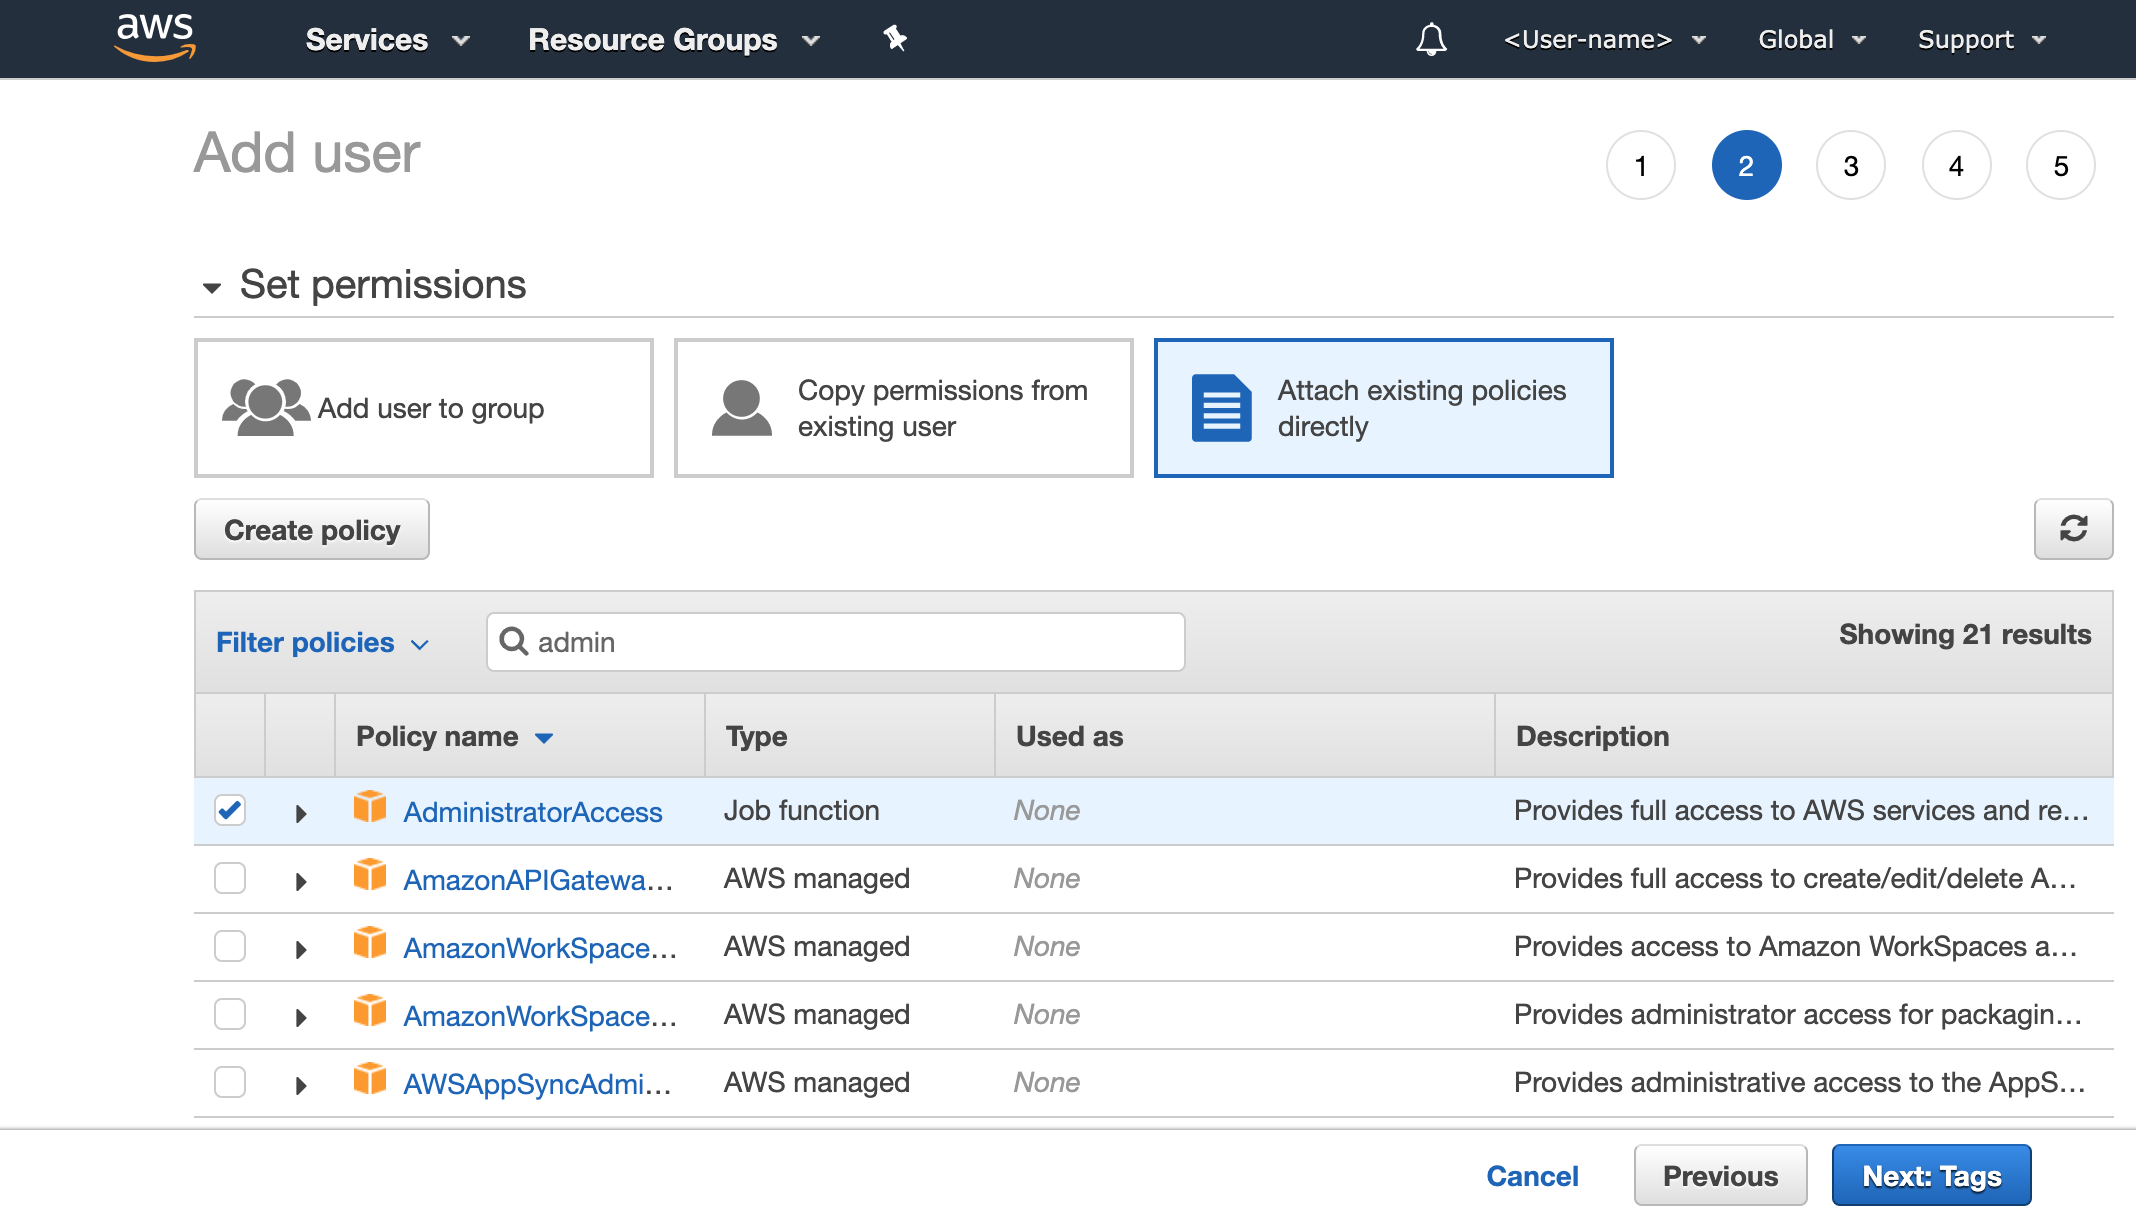
Step 2
We recommend granting full AWS access to the IAM user by selecting the Attach Existing Policies Directly tab and selecting Administrator Access. Note that you can opt to restrict access of this user by selecting other policies. More advanced users can opt to allow only specific services to their IAM user.
Next, you can elect to add optional tags. Tags can include user information, such as an email address, or can be descriptive, such as a job title. You can use the tags to organize, track, or control access for this user. This is an optional step.
Finally, you will be asked to review your new user profile before officially creating it by clicking on the Create User button.
Take note of the user credentials
Make sure you download, or take note of the user security credentials as noted in the final step of the process and the AWS Console login url that is created for your account.
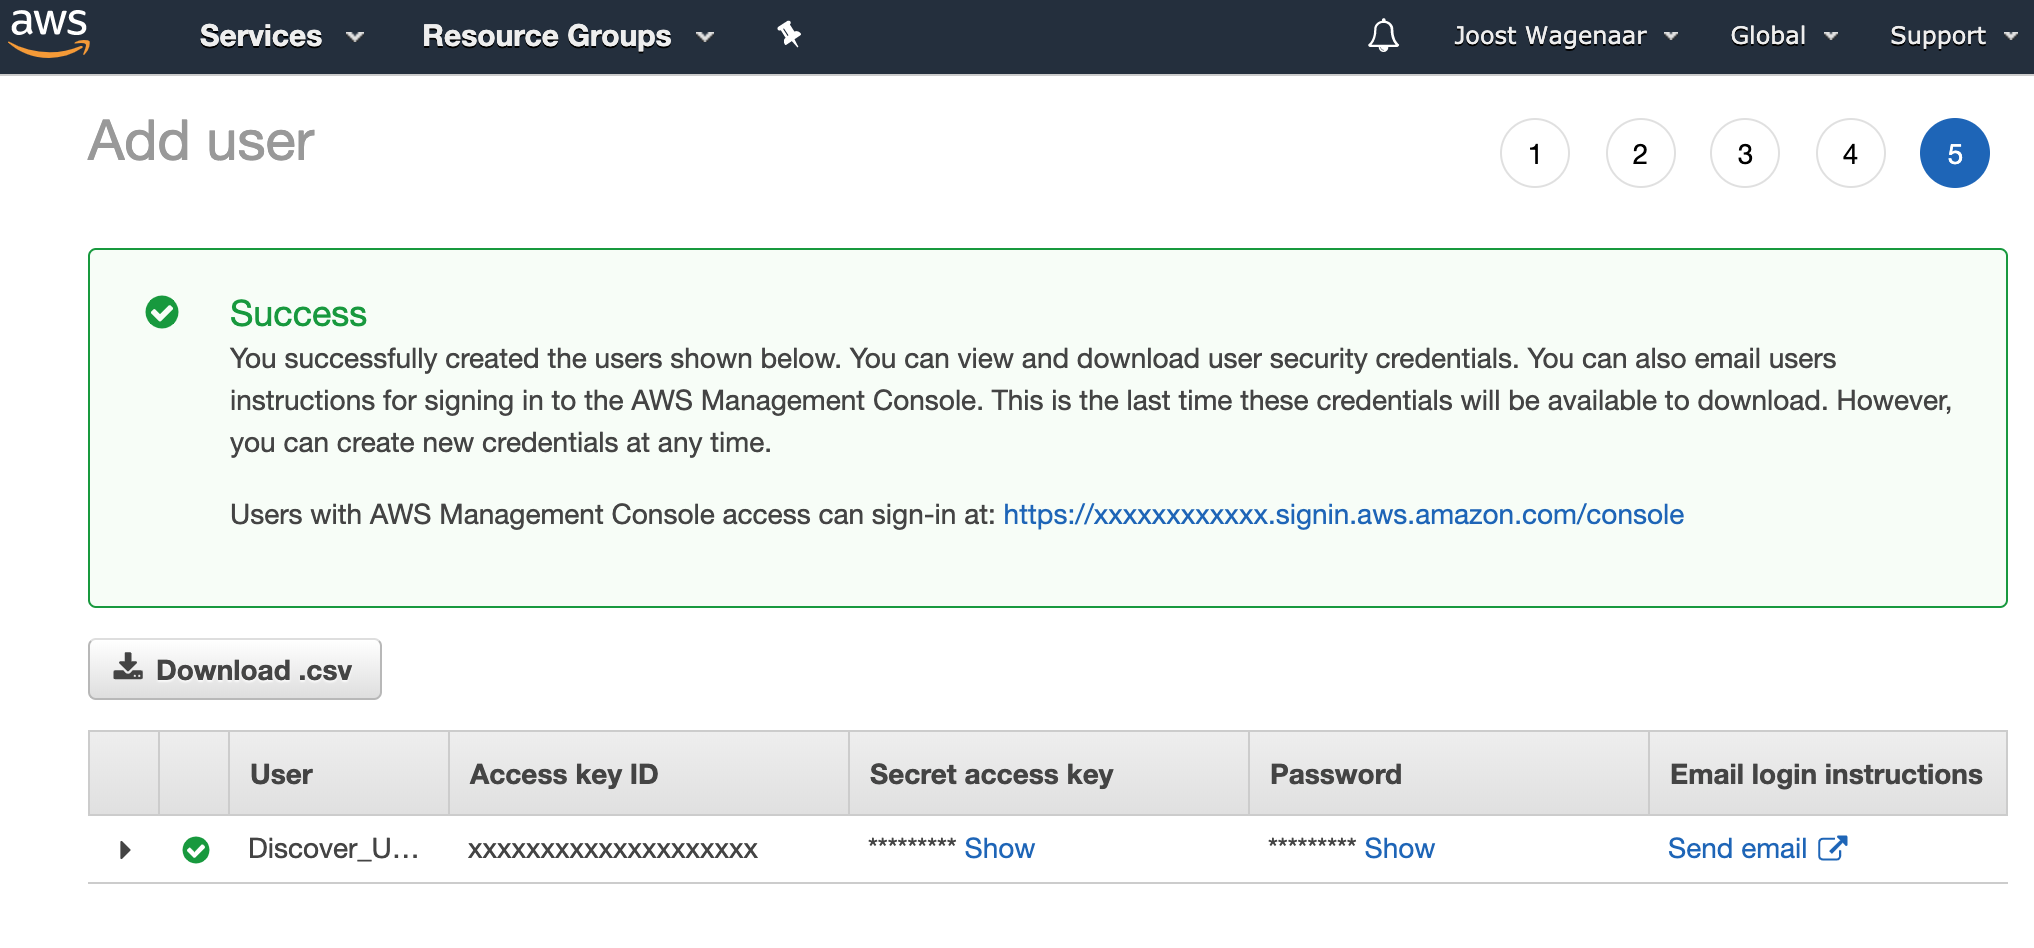
Once you’ve created your IAM user, you can use this user instead of your root account user to access AWS services. Next, you can proceed to the last step of this configuration workflow to create a S3 bucket in case you want to copy public data to your personal AWS account.
(Optional) Creating an AWS S3 Bucket
If you want to transfer datasets from Pennsieve Discover to your own AWS account, you can setup a S3-bucket that can be used as the target for the data transfer.
From the AWS Management Console, select type S3 in the Find Services search box and then click on S3 to open the AWS S3 management console. Click on Create Bucket to initiate the process of creating a new S3 Bucket.
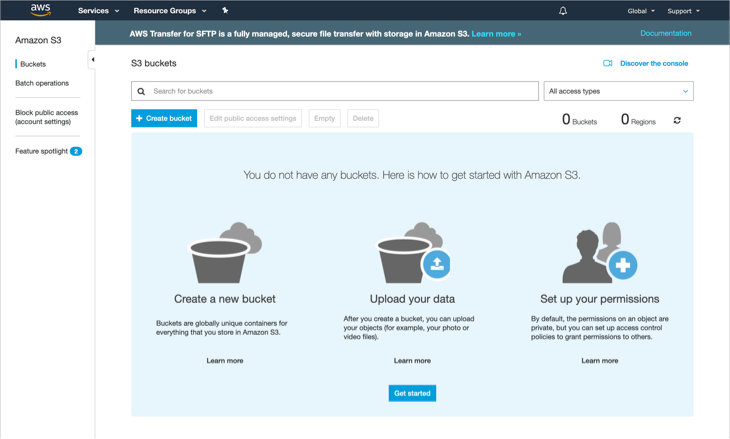
After clicking Create Bucket, you'll be stepped through the process of creating a bucket. Keeping all settings to default will ensure a secure private bucket. During the final step, review and create the bucket.
Region
All Pennsieve Discover objects are in the U.S. East (N. Virginia) region. Keeping your buckets in the same region will help reduce any AWS fees as there are no transfer costs within a AWS region!
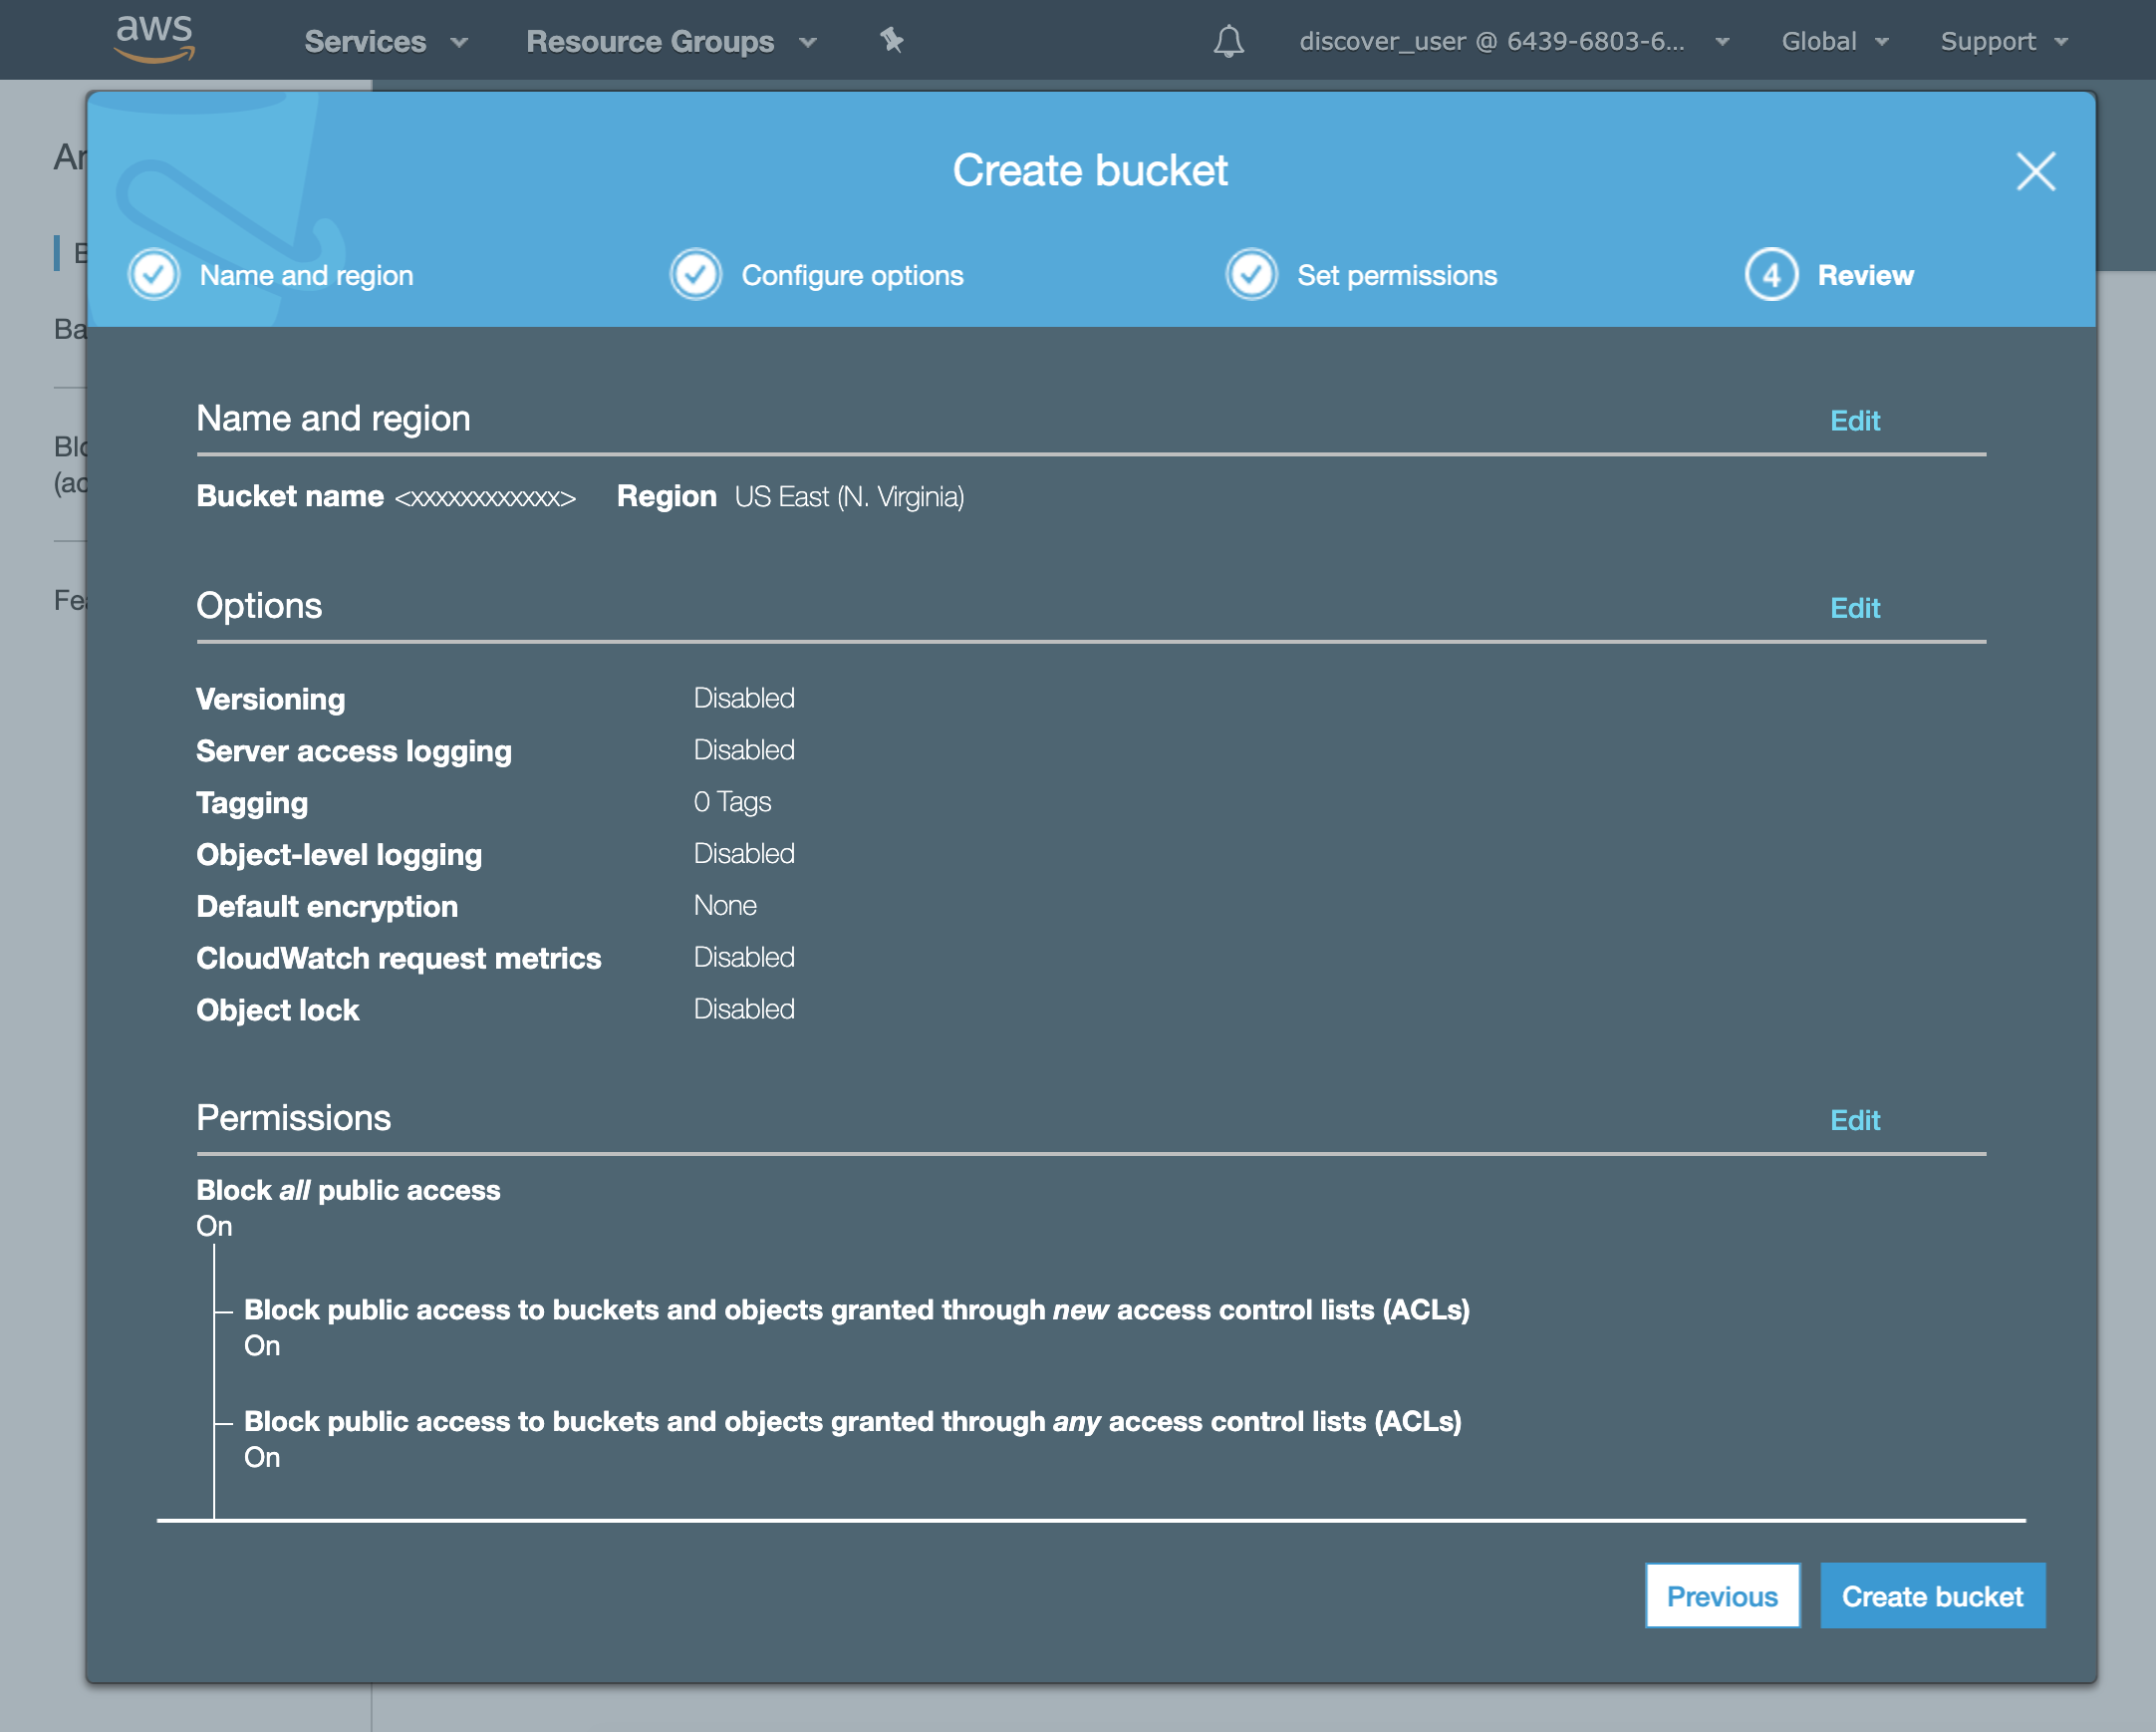
This completes the configuration of your AWS account for the purpose of accessing Pennsieve datasets in the cloud. Note that AWS provide advanced tools to more granularly define user roles and permissions which are not covered in this walkthrough. Please refer to the AWS manuals for additional information.
Updated over 3 years ago